In our daily operations, we rely on Airflow (Cloud Composer) to run hundreds of dags. While we have integrated it with ServiceNow and SMTP for airflow notifications, we found that these measures were insufficient in providing us with valuable insights. We needed a way to track the number of failed dags over a specific period, identify which dags were failing more frequently, and gain a comprehensive understanding of our workflow performance.
To address these challenges, we decided to create a Looker Studio dashboard by leveraging the power of BigQuery and redirecting Airflow (Cloud Composer) logs through a log sink. By storing our logs in BigQuery, we gained access to a wealth of data that allowed us to generate informative charts and visualizations. In this blog post, I will guide you through the step-by-step process of setting up this invaluable solution.
Create a Log Sink
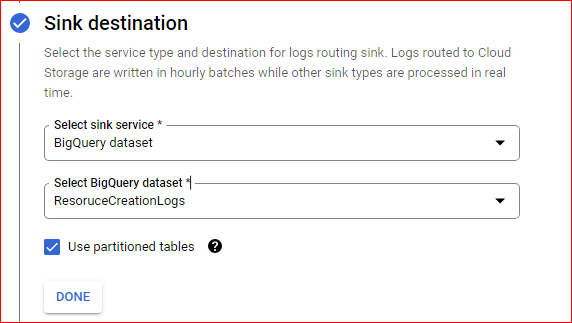
To begin the process, navigate to the log router and create a sink using the following query. When configuring the sink, select the desired target as a BigQuery dataset where you want all the logs to be redirected. Additionally, it is recommended to choose a partitioned table, as this will optimize query performance, facilitate the cleanup of older logs, and reduce costs. By partitioning the table, BigQuery will scan less data when querying specific time ranges, resulting in faster results and more efficient resource usage.
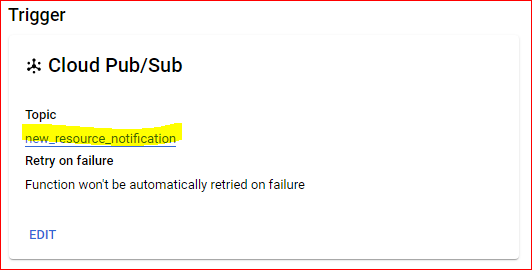
"Marking task as"
resource.type="cloud_composer_environment"
log_name: "airflow-worker"
labels.workflow!="airflow_monitoring"
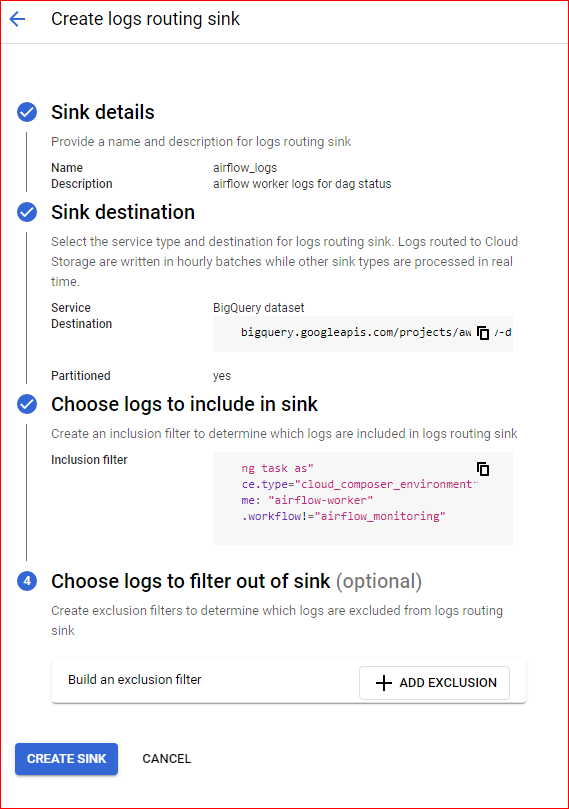
Upon successful creation of the log sink you would be able to see airflow_worker table created in the dataset you have specified during the log sink configuration.
Write a query to get insight
Following query retrives the data from airflow_worker table and
- Adjusting timestamps to “America/Toronto” timezone: Airflow (Cloud Composer) logs are stored in UTC timestamps by default. However, our scheduler is set to the “America/Toronto” timezone. To ensure consistency, I’m converting the timestamps to the “America/Toronto” timezone. Keep in mind that you may need to modify this part based on your own timezone settings.
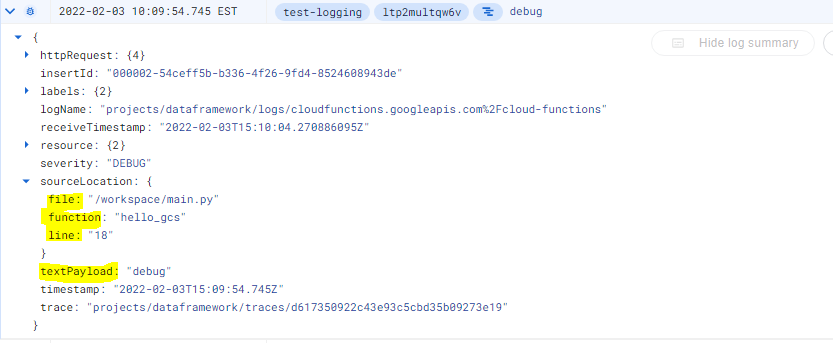
- Retrieving status information: The status of each Airflow DAG is captured in the
textPayloadcolumn. I’m using regular expressions to extract one of three possible statuses: “Success,” “Fail,” or “Skip.” This allows us to easily identify the execution outcome of each DAG run.
Since status information is only available at task level, I am considering dag as failed if any task within the dag has failed. if you choose to show information at task level you might need to modify this query.
SELECT
  *
FROM (
  SELECT
    DATE(timestamp, "America/Toronto") AS execution_date, -- this is UTC date
    datetime(timestamp, "America/Toronto") as execution_timestamp,
    labels.workflow,
    DATE(CAST(labels.execution_date AS timestamp), "America/Toronto") AS schedule_date, -- UTC Date
    datetime(cast(labels.execution_date AS timestamp), "America/Toronto") AS schedule_timestamp, --- UTC timestamp
    labels.try_number,
    CASE
      WHEN CONTAINS_SUBSTR(textPayload, "Success") THEN "success"
      WHEN CONTAINS_SUBSTR(textPayload, "SKIPPED") THEN "skip"
    ELSE
    "fail"
  END
    AS status,
    ROW_NUMBER() OVER(PARTITION BY labels.workflow, CAST(labels.execution_date AS timestamp)
    ORDER BY
      CASE
        WHEN CONTAINS_SUBSTR(textPayload, "Success") THEN 1
        WHEN CONTAINS_SUBSTR(textPayload, "SKIPPED") THEN 2
      ELSE
      0
    END
      ) AS rnk
  FROM
    ss-org-logging-project.airflow_dags_status.airflow_worker )
WHERE
  rnk = 1
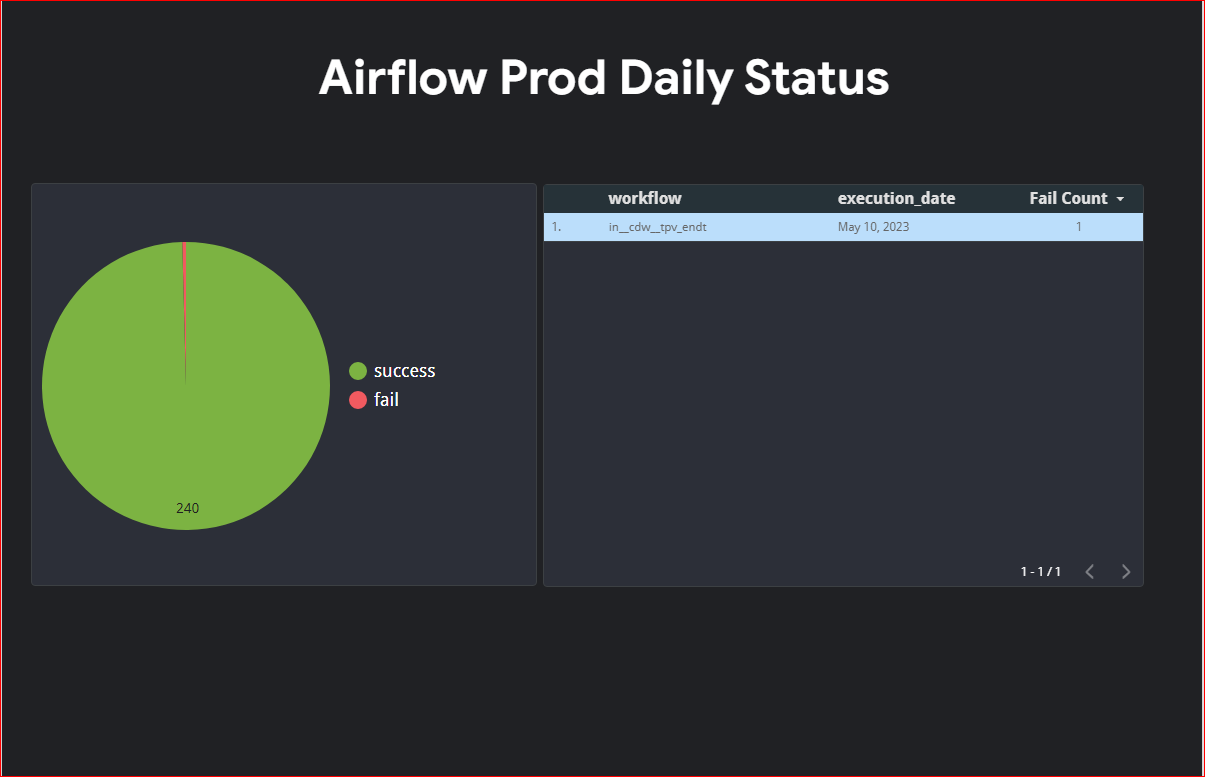
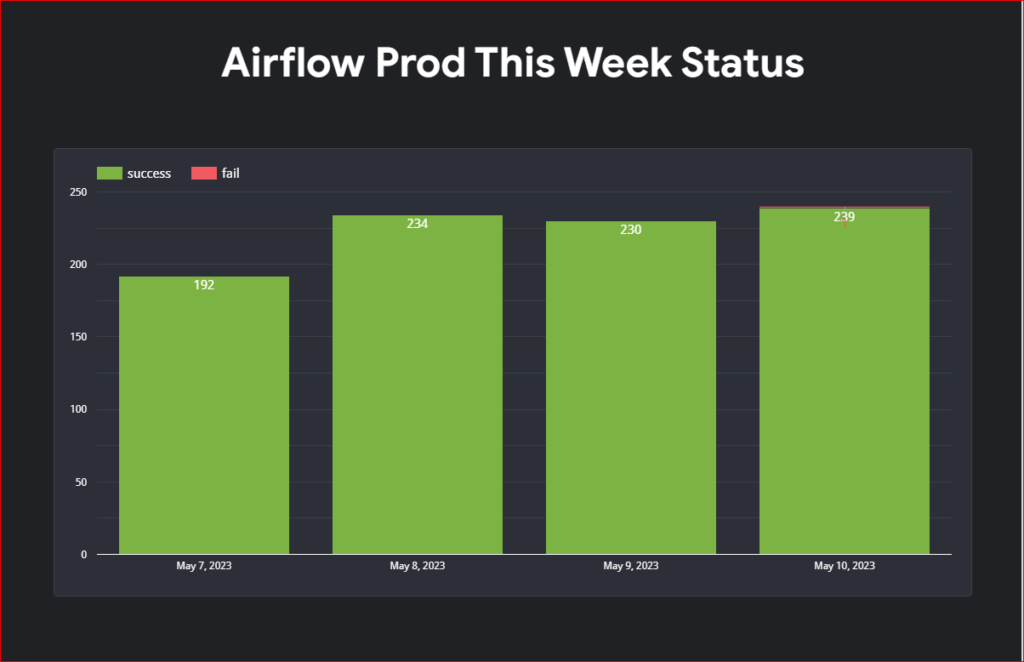
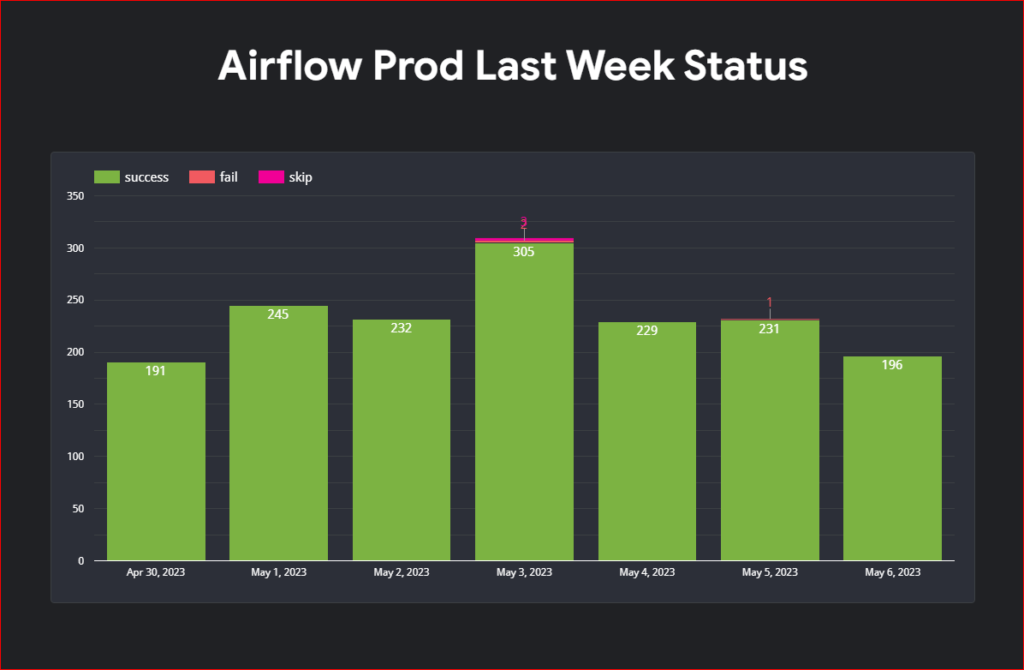
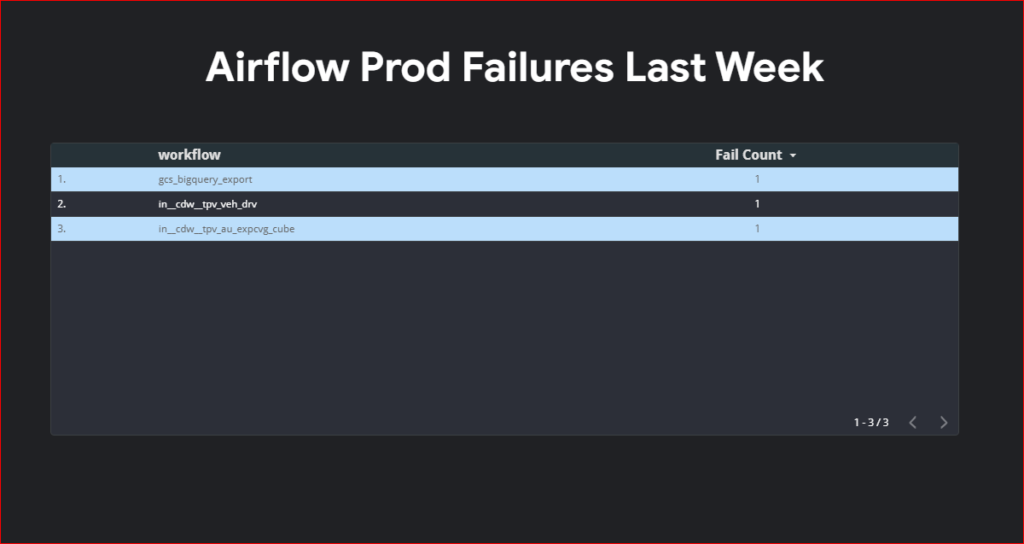
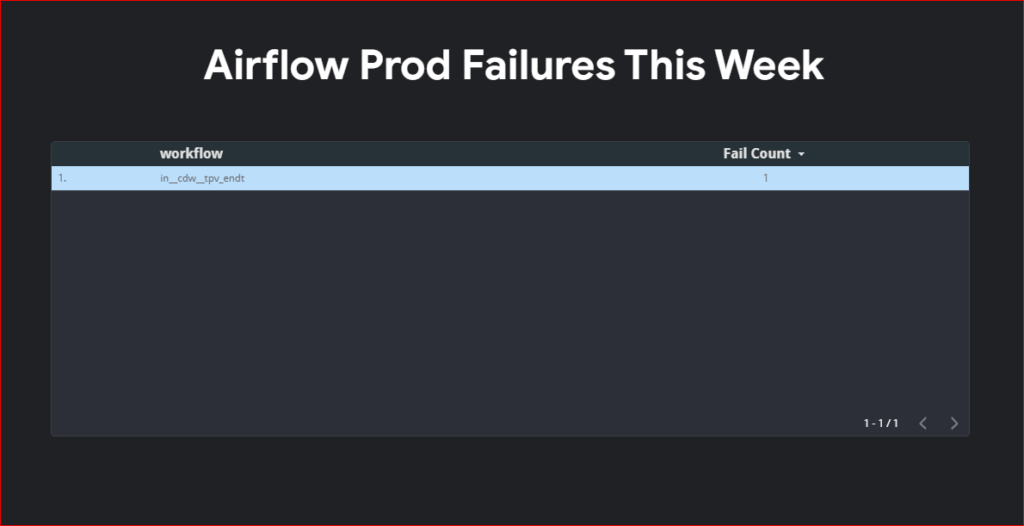
Dashboard.
Unfortunately due to my organization policy I can’t share my looker studio dashboard outside my organization so you will have to create your own dashboard. I am uploading screenshot of my dashboard for your reference.